> For the complete documentation index, see [llms.txt](https://docs.debricked.com/llms.txt). Markdown versions of documentation pages are available by appending `.md` to page URLs; this page is available as [Markdown](https://docs.debricked.com/product/administration/repositories/repository-groups.md).
# Repository groups
Learn how to group your repositories integrated with Fortify SCA.
It can be difficult to get a quick overview of all your repositories, especially if you have a lot of them. To make your life a bit easier, the Fortify SCA tool enables you to group repositories together, allowing you to organize your projects, e.g. based on team structure.
A group can consist of multiple repositories, but also other groups. It is also possible for one group to exist as a sub-group in multiple parent groups. Keep in mind that changes made to a group will have an effect in all places the group exists.
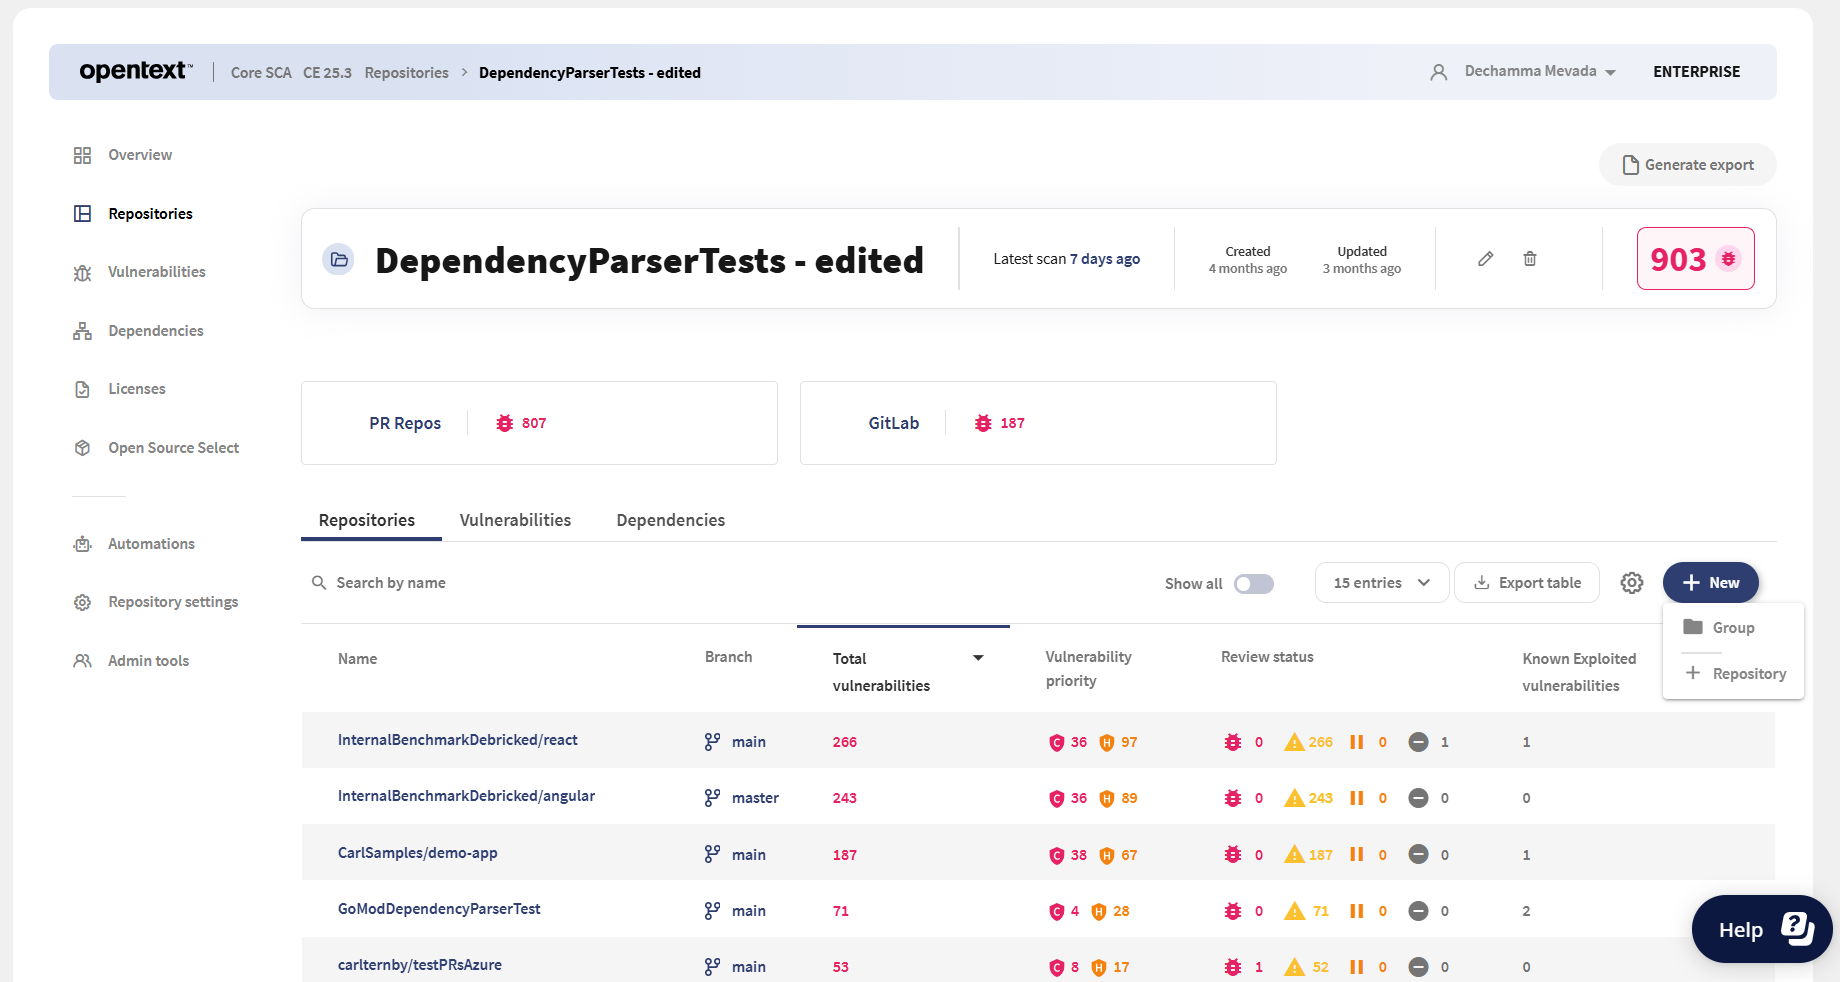
You can create groups from the repository view under **Repositories.** To create groups:
1. Go to **Repositories** on the left side menu.
2. Click **+ New** and select **Group**.
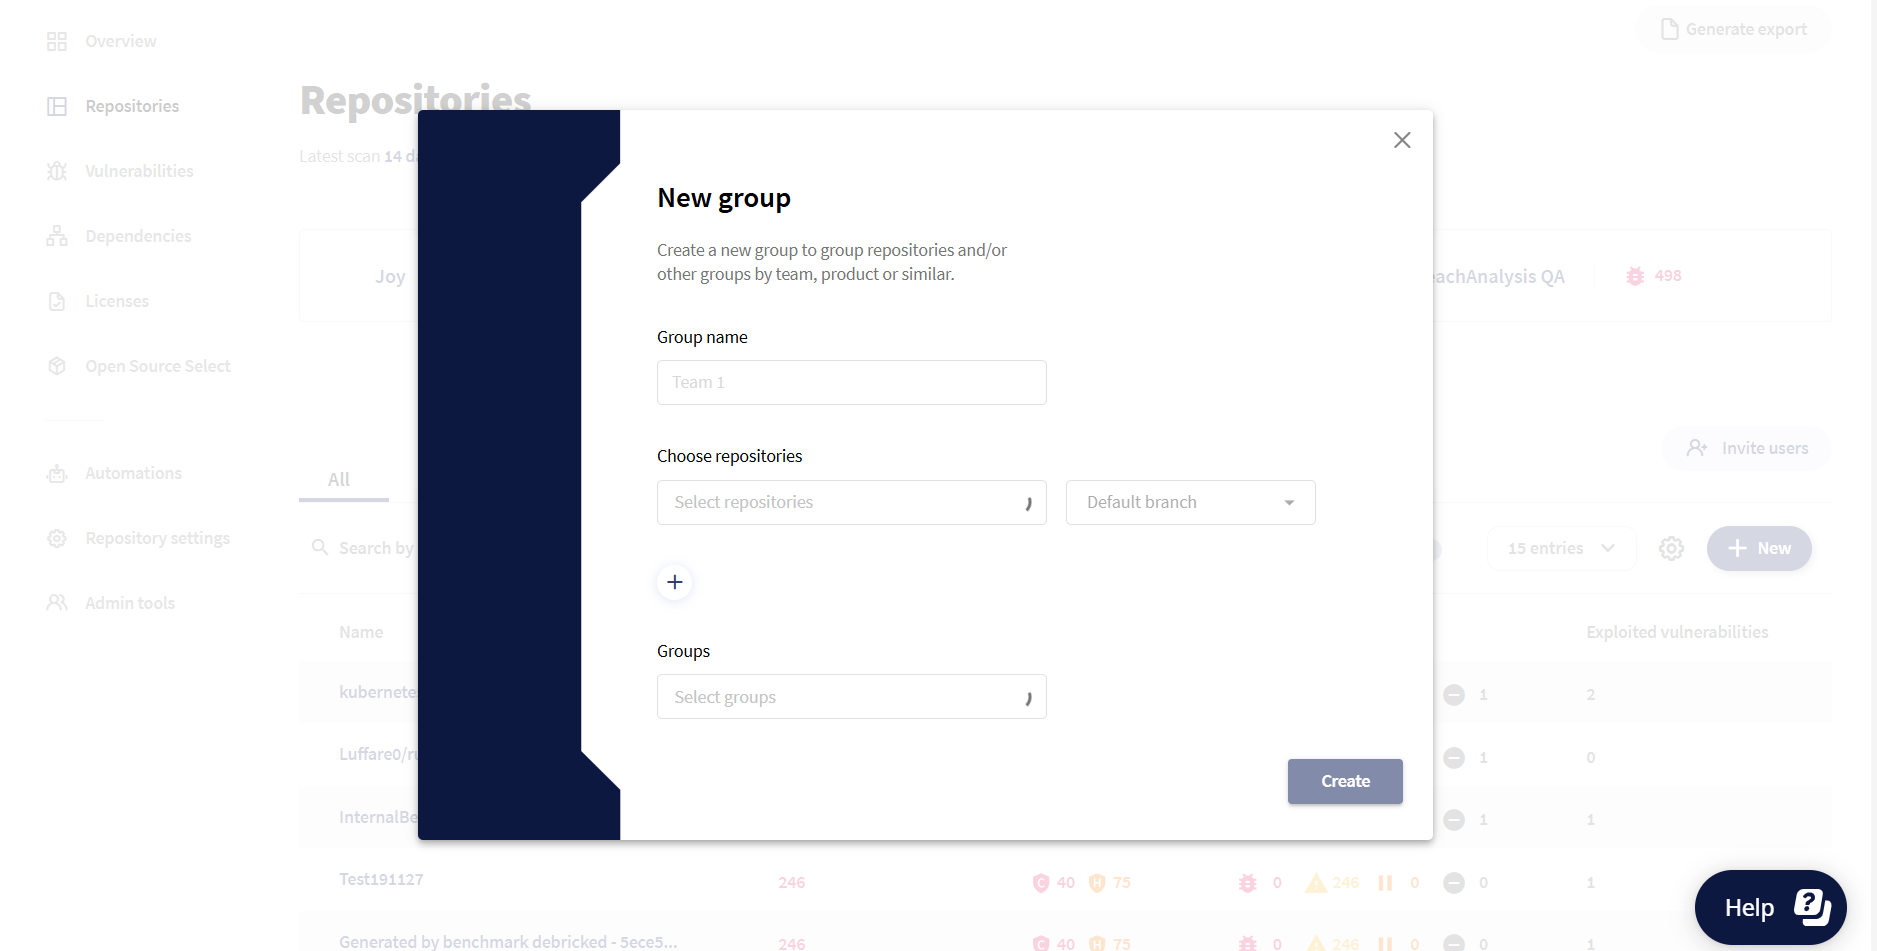
3. On the **New group** window:
1. Enter the **Group name**.
2. Select the repositories for the group. You can associate multiple repositories to the group by selecting repositories from **Choose repositories** drop-down and creating new rows by clicking the plus button.
3. Select the default branch for the repository. You can allocate default branch to the repository by selecting branch from **Default branch** drop-down in each row only if a repository is selected in that row. This option is disabled if you select multiple repositories in a row. If you do not manually select the default branch, the system will automatically choose it based on the last commit.
4. Select the relevant **Groups**.
5. Click **Create**.
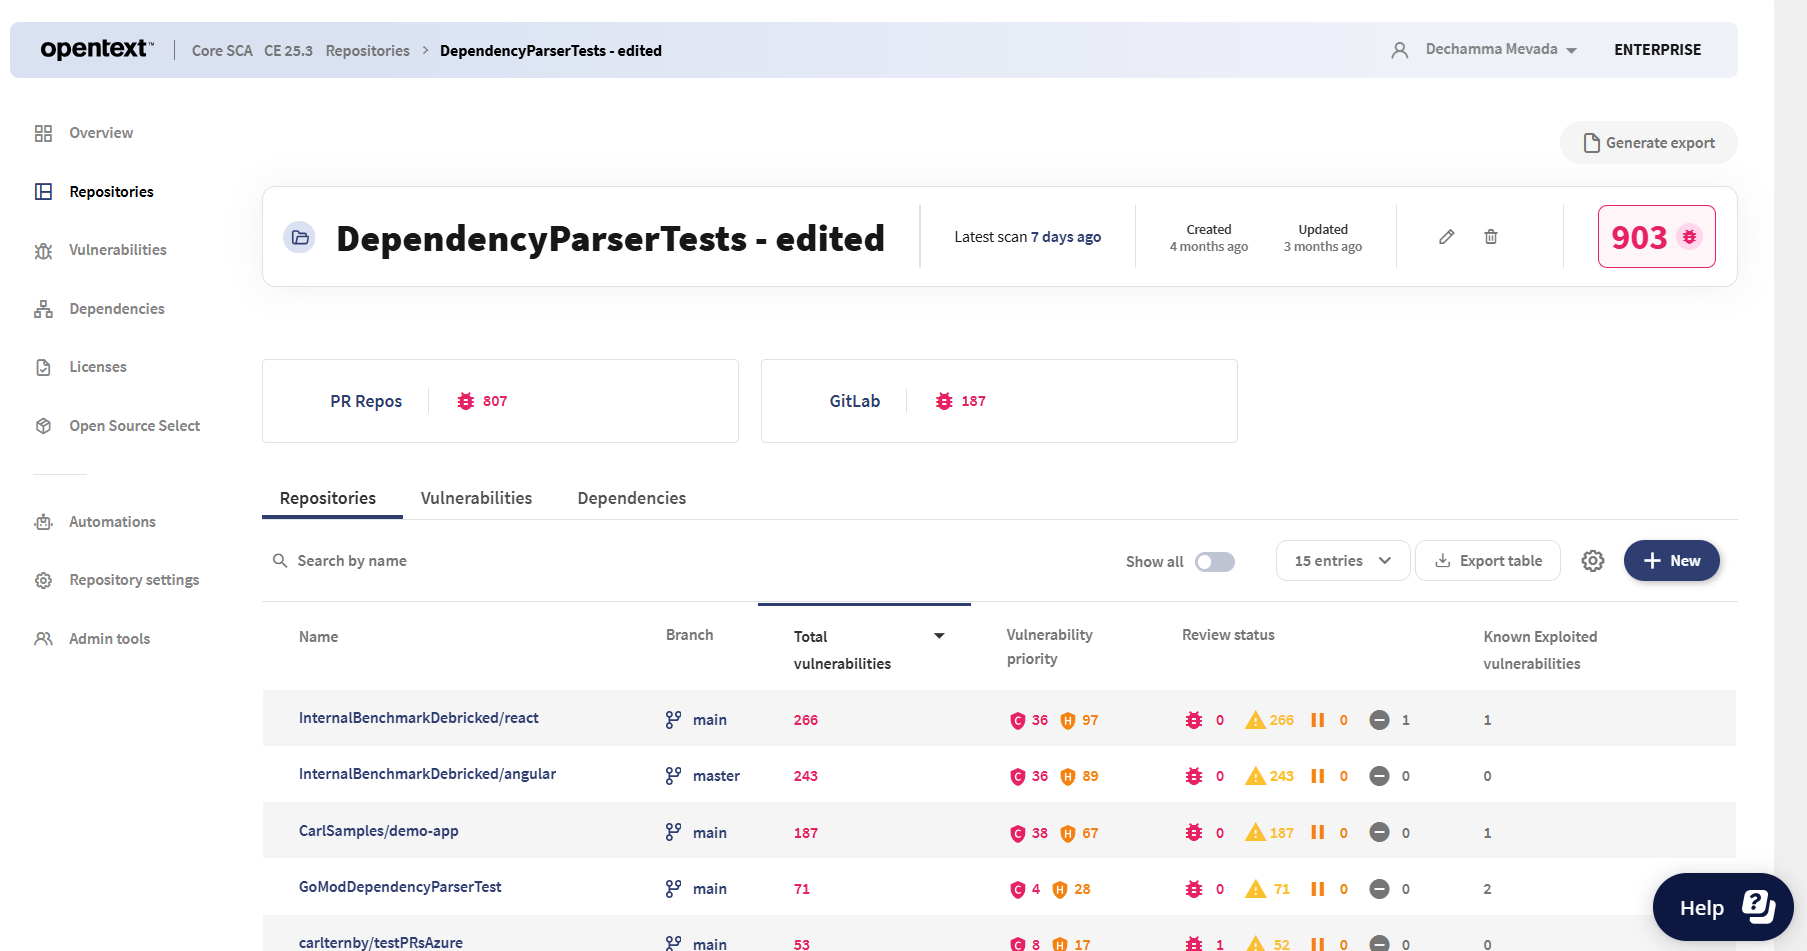
Once created, the group will be shown with the name and aggregation of vulnerabilities in the linked repositories and groups. You can also view the default branch details in the repositories tab of repo groups.
{% hint style="info" %}
'AUTO' is displayed only if the system has selected the default branch.
{% endhint %}
### **Delete or edit a repository group**
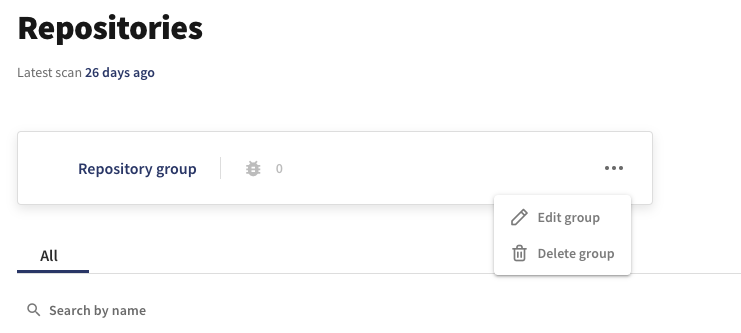
You can edit or delete a specific group by clicking on the three dots next to the group’s name. Clicking **Edit** will open the same view as when creating the group, enabling you to select or deselect repositories or groups included in the group. Keep in mind that if you delete a group, all groups that exist solely within this group will also be deleted.
### Export repository group table data
You can export the filtered and visible data in the table to a CSV file. To do so, click **Export Table** located at the top-right corner of the table. *For more information, refer to the* [*Export table data*](/product/administration/repositories/export-table-data.md) *topic.*
---
# Agent Instructions
This documentation is published with GitBook. GitBook is the documentation platform designed so that both humans and AI agents can read, navigate, and reason over technical content effectively. Learn more at gitbook.com.
## Querying This Documentation
If you need additional information that is not directly available in this page, you can query the documentation by asking a question.
Perform an HTTP GET request on the following URL with the `ask` and `goal` query parameters:
```
GET https://docs.debricked.com/product/administration/repositories/repository-groups.md?ask=&goal=
```
`ask` is the immediate question: it should be specific, self-contained, and written in natural language.
`goal` is what the user is ultimately trying to achieve, the reason they need the answer. Sharing it helps GitBook give you a better, more relevant answer. A goal is most helpful when it describes the outcome the user wants rather than restating the question. For example, with `ask=how do I create an API token`, a goal like `automate deployments from our CI pipeline` lets GitBook tailor the answer to that use case.
The response will contain a direct answer to the question and relevant excerpts and sources from the documentation.
Use this mechanism when the answer is not explicitly present in the current page, you need clarification or additional context, or you want to retrieve related documentation sections.